Installing a new water filter in your home can significantly improve your drinking water quality by removing contaminants like lead, chlorine, and sediment. However, it’s important to properly flush the filter before using it to prepare it for filtering your water.
As someone who frequently installs water filtration systems, I’ve learned the proper way to flush a new filter to maximize performance. In this article, I’ll walk you through my step-by-step process for flushing a water filter before its first use.
Flushing Steps that I Follow Every Time
Flushing the water filter is essential, it doesn’t matter if you are using a new or older one, in both cases, flushing is important. Flushing the water filter is very easy, just you will need to follow the steps below and you will get your job done.
Step 1 – Locate the Water Shut-off Valve:
Identify the valve that controls the water supply to your water filter. This valve is typically located near the filter housing or under the sink.
Step 2 – Turn Off the Water Supply:
Turn off the water supply to the filter using the shut-off valve. This will prevent water from spraying out when you disconnect the old filter.
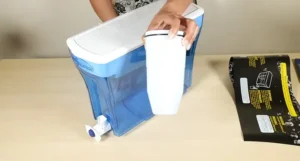
Step 3 – Remove the Old Filter:
Carefully remove the old filter from its housing. Follow the manufacturer’s instructions for your specific filter model.
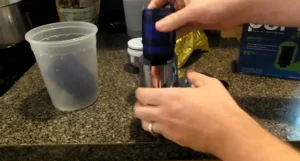
Step 4 – Install the New Filter:
Insert the new filter into the filter housing, ensuring it is properly aligned and securely seated. Follow the manufacturer’s instructions for your specific filter model.
Step 5 – Turn On the Water Supply:
Before turning on the water supply, you will need to place a towel or large piece of cloth next to the water dispenser. It will help to absorb the spilled water from the water filter. Slowly open the water shut-off valve to allow water to flow to the filter.
Step 6 – Flush the Filter:
Now, place a clean jar or pitcher to collect the flush water that you can use for watering plants. Run water through the filter for at least five minutes. This will remove any loose carbon particles or air pockets. Discard the flushed water. According to the experts, flush about 3 to 5 gallons of water for better outcomes.
Step 7 – Enjoy Clean, Fresh Water:
Once the flush is complete, you can start using your new water filter.
NOTE – If you are willing to flush your older water filters for maintenance purposes, then you will need to start from Step 5, and if you are looking for the procedure for the Refrigerator’s filter, then you can follow these steps as well.
Precautions to Take
Taking proper precautions when flushing a new water filter is important to avoid any issues. Here are some key precautions to keep in mind:
- Discard the First Flush of Water
The initial flush water may contain loose carbon particles or impurities. It’s best to discard this water to avoid consuming any contaminants.
- Use a Clean Container
Collect the flushed water in a clean container, such as a pitcher or pot. Avoid using containers that have previously held food or other substances that could contaminate the water.
- Be Patient
The flushing process may take a few minutes, depending on the type of filter and the water pressure in your home. Allow the water to flow freely until the flush water runs clear.
Why Flushing is Essential
Flushing a new water filter is crucial for several reasons:
- Removes Loose Carbon Particles
During the manufacturing and transportation process, tiny carbon particles may become dislodged from the filter’s core. Flushing helps to remove these particles, preventing them from ending up in your drinking water.
- Eliminates Air Pockets
Air pockets within the filter can interfere with the water flow and affect the filtration process. Flushing forces out any trapped air, ensuring optimal water flow and filtration efficiency.
- Enhances Taste and Odor
Flushing removes any impurities or lingering manufacturing residues that could impart unpleasant tastes or odors to your water.
Wrapping Up
Installing a new water filtration system is an easy process if you take the time to properly flush the filter first. Following the manufacturer’s instructions and flushing for the recommended duration will remove any debris, prime the filter, and prepare it to start producing cleaner water. Periodically flushing the filter keeps it working efficiently for years to come. With a quality filter and proper care, you’ll enjoy tastier, healthier water from every tap.
FAQs About Flushing Water Filters
How do I know when the flush is complete?
Flushing is complete once the initial discolored water has cleared and the flow has stabilized without sputtering. The manufacturer’s instructions will specify a recommended flushing time.
What should I do if there are leaks during flushing?
If leaks occur, turn off the water supply and check that all connections are completely secure. Retry flushing and monitor leaks closely. If leaks persist, contact the manufacturer for advice – don’t attempt to use the filter.
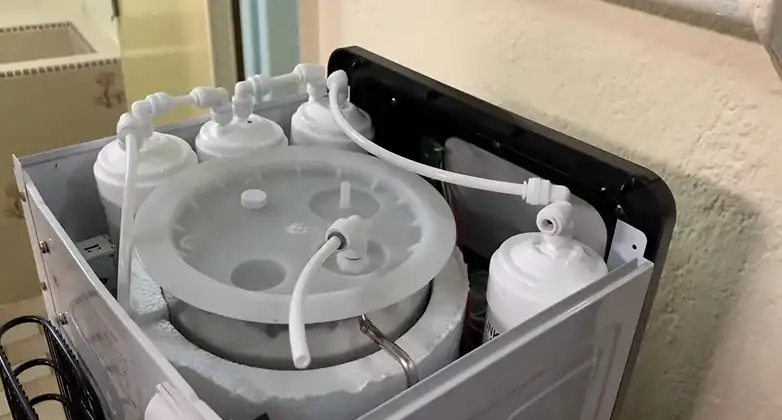
Is flushing required for all new filter types?
While flushing is strongly recommended for most filters, some specialized filters like reverse osmosis systems may not require flushing. Always consult the user manual.
Can I damage my filter by flushing it for too long?
It’s best not to exceed the recommended flushing time. Excessive flushing won’t damage the filter but wastes water. Stick to the manufacturer’s guidelines.
How often should I flush my filter after the initial installation?
Periodic flushing helps maintain your filter. For filters without a flush valve, flushing every 3-6 months extends the filter’s lifespan. Check your owner’s manual for specific guidelines.